
How to break a lesson into small steps
By the Workshopy teamPublished 8 min read
Start from what students should be able to do at the end, list the skills that takes, and give each skill its own step. Each step adds one new idea, shows it once, and ends in something the student does and can check: a result on their screen, an answer, a line they paste. A step is the right size when most of the class finishes it in a few minutes and you can say in one sentence how they know they're done.
Start from what students will do at the end
Write one sentence about the end of the lesson before you write any step: "students build a web page with their name on it and change its colours", "students total a month of expenses in a spreadsheet". Then list what that takes, as things a student does, not topics you cover. "Create a file and open it in the browser", "add a heading", "change the heading's colour with a CSS rule". Each line on that list is a candidate step.
This is backward design, and Greg Wilson's Teaching Tech Together lays it out for exactly this kind of lesson: decide what the final task is, list the knowledge and skills it uses, write at least one small check for each, and order the checks into an outline. Only then write the material that gets learners from one check to the next. A step that doesn't lead to one of the checks is a tangent, however interesting.
The list also shows what you assumed. If "open the terminal" isn't on it and the first step needs a terminal, either it goes on the list or the students who have never opened one are lost before you begin.
Put one new idea in each step
The reason small steps work is how little a learner can hold at once. Nelson Cowan's review of the research on short-term memory puts the limit at about four chunks, three to five, for an adult. A new idea takes several of those chunks for someone who has never met it: a CSS rule is a selector, a property and a value, and a beginner has to hold all three while typing it.
Barak Rosenshine's Principles of Instruction, drawn from classroom studies of the most effective teachers, puts the consequence plainly: present only small amounts of new material at a time, then help students practise it, and move to the next step only once they have the first. The UK's early-career teacher materials give the same reason: smaller steps mean fewer new pieces competing for working memory at once.
So read each step and count the new things in it. "Make the heading green" is one: a rule that changes one property. "Style the page" (a font, a margin, a colour, a class and a <link> to a separate file) is five, and the student who gets one wrong won't know which. Split it. The things students already know don't count: once they have written a rule, the second rule is practice, not a new idea.
End every step with something students can check
A step isn't finished when you have explained something. It is finished when the student has done something and can tell whether it worked. Write the last line of every step as the result they should see:
- "You're done when your heading is green."
- "You're done when the total in B13 says 1,245."
- "You're done when
git statussays nothing to commit."
That line does two jobs. The student knows when to move on without asking, and you know who has. Wilson's process puts a check like this at the end of each piece of a lesson, and Rosenshine's effective teachers checked the understanding of every student before moving on, not only the ones who raised a hand.
If you can't write that line, the step is either an explanation with nothing to do, or it holds more than one idea. Fold the explanation into the step that uses it, or split the step until each part has a result. For a check you can read in seconds across a whole room, see checking for understanding without stopping the class.
Size a step by minutes, not by topic
Topics are a bad unit: "variables" can be a two-minute step or an afternoon. Size steps by how long a typical student takes. In a hands-on class, three to ten minutes of doing is a good range: short enough that a student who goes wrong finds out soon, long enough that the class isn't moving every minute. Wilson suggests three to five such pieces in an hour of teaching, each with its explanation and its check.
Aim for most students to get the step right. Rosenshine reports that in a study of fourth-grade mathematics, 82 percent of students' answers were correct in the classrooms of the most successful teachers, and he puts the success rate that best supports learning at about 80 percent. A step most of the class fails is too big or too early; a step everyone finishes in a minute can join its neighbour.
Small steps take more teaching time, not less. The most effective mathematics teachers in Rosenshine's account spent about 23 minutes of a 40-minute lesson presenting and guiding practice, the least effective about 11, and then walked from desk to desk explaining it all again.
Order the steps, then join them back up
Order the list so every step uses only what came before it. Write each step's new idea in a word or two beside it and read down the column: an idea used before it was introduced is a step in the wrong place.
Breaking a skill into pieces has one cost: students can lose sight of what the pieces are for. Two habits keep the whole in view:
- Show the goal first. The first step says what they'll have at the end, ideally with a picture of it.
- Plan a step that puts the pieces together. After three steps that each change one thing, a step that asks for all three at once, with less guidance, is where the skill becomes theirs.
Fade the detail as you go. The first time students save and refresh, write it out. By the fourth step, "save and refresh" is enough. Writing lab instructions students can follow covers the actions inside a step.
Find the step that is still too big
You will get some sizes wrong, and the class will show you where. Watch for the step where most of the room is still working long after the others finished, where help requests pile up, or where students who finished early are waiting. That step usually holds two ideas.
Note it during the class and split it before the next one. A step that keeps students waiting needs the opposite: join it with the next one, or add an optional extra for whoever finishes first (pacing a lesson at different speeds).
How Workshopy shows a lesson as small steps
In Workshopy a lesson is one Markdown document, and every # heading starts a step, so the list you wrote becomes the lesson's outline (writing a workshop in Markdown has the format). The editor shows about how long the lesson takes from its steps, so a plan that needs more than the class has shows before you teach it.
Students see one step at a time and press Done when they reach its result, or Need help when they can't. The "you're done when" line can be checked for them: a Check your work block asks them to paste what they got and says at once whether it's right, with your own words for the mistakes you expect. A quiz step or a practice step ends a stretch of steps with questions they answer.
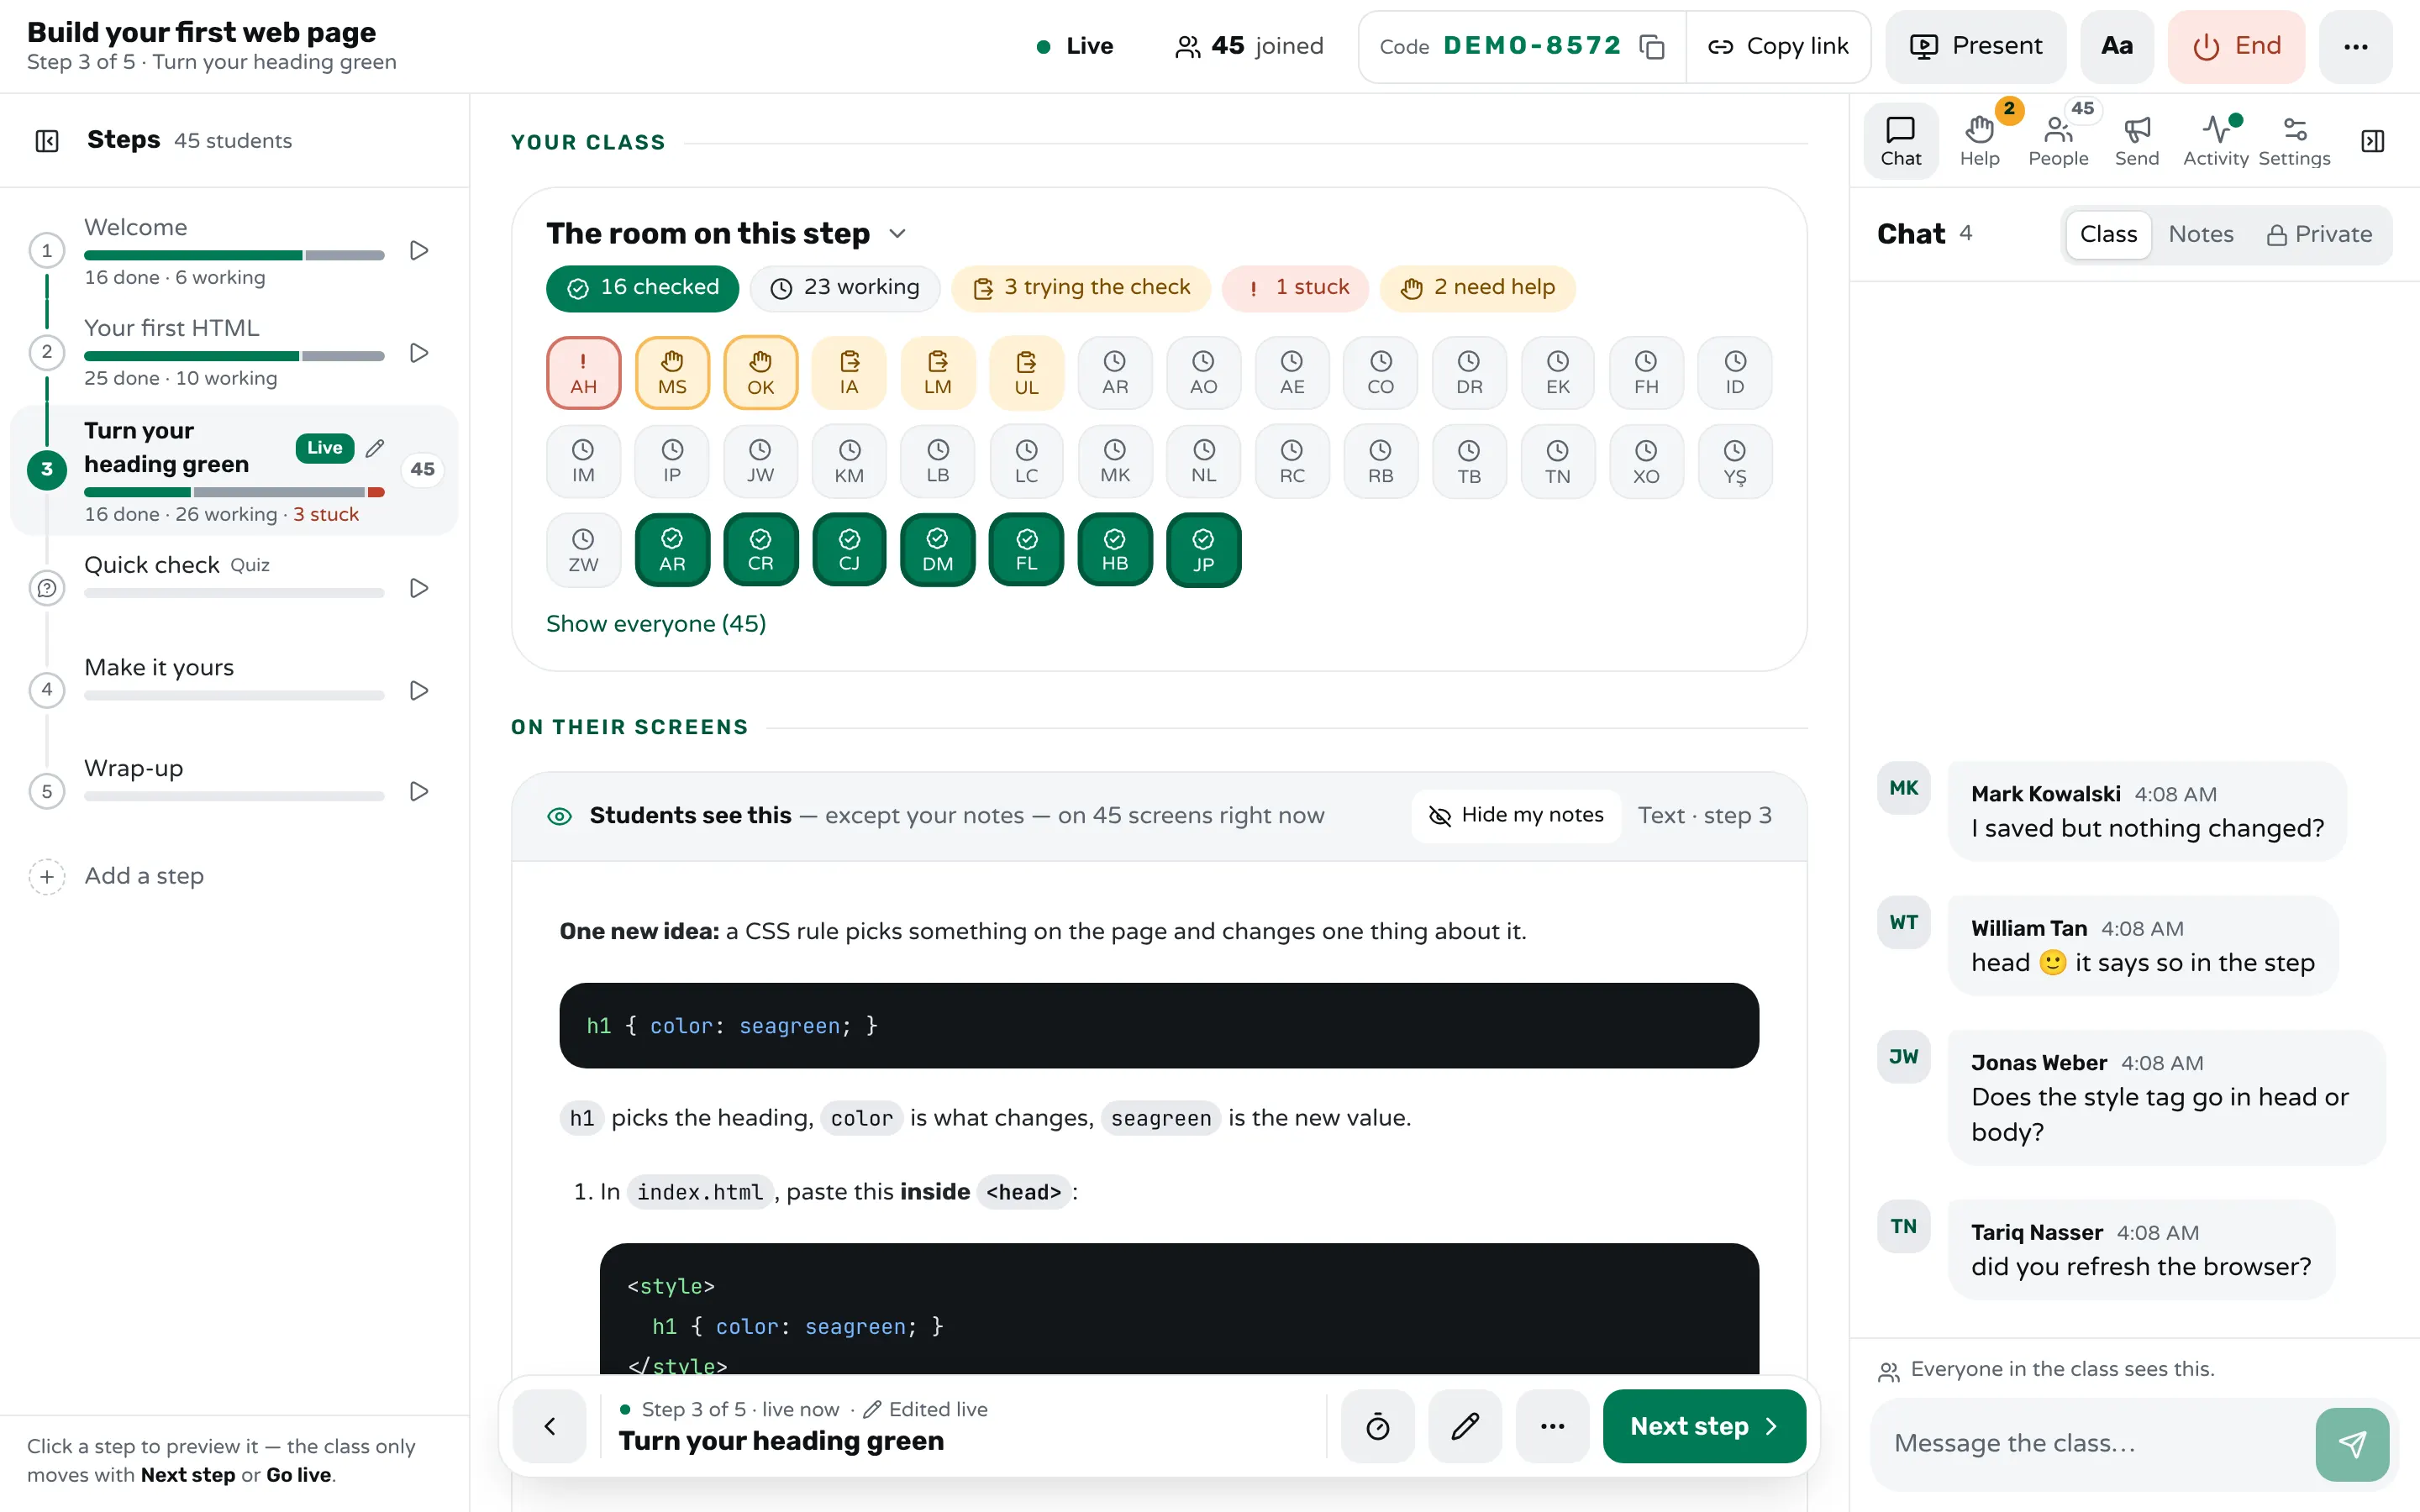
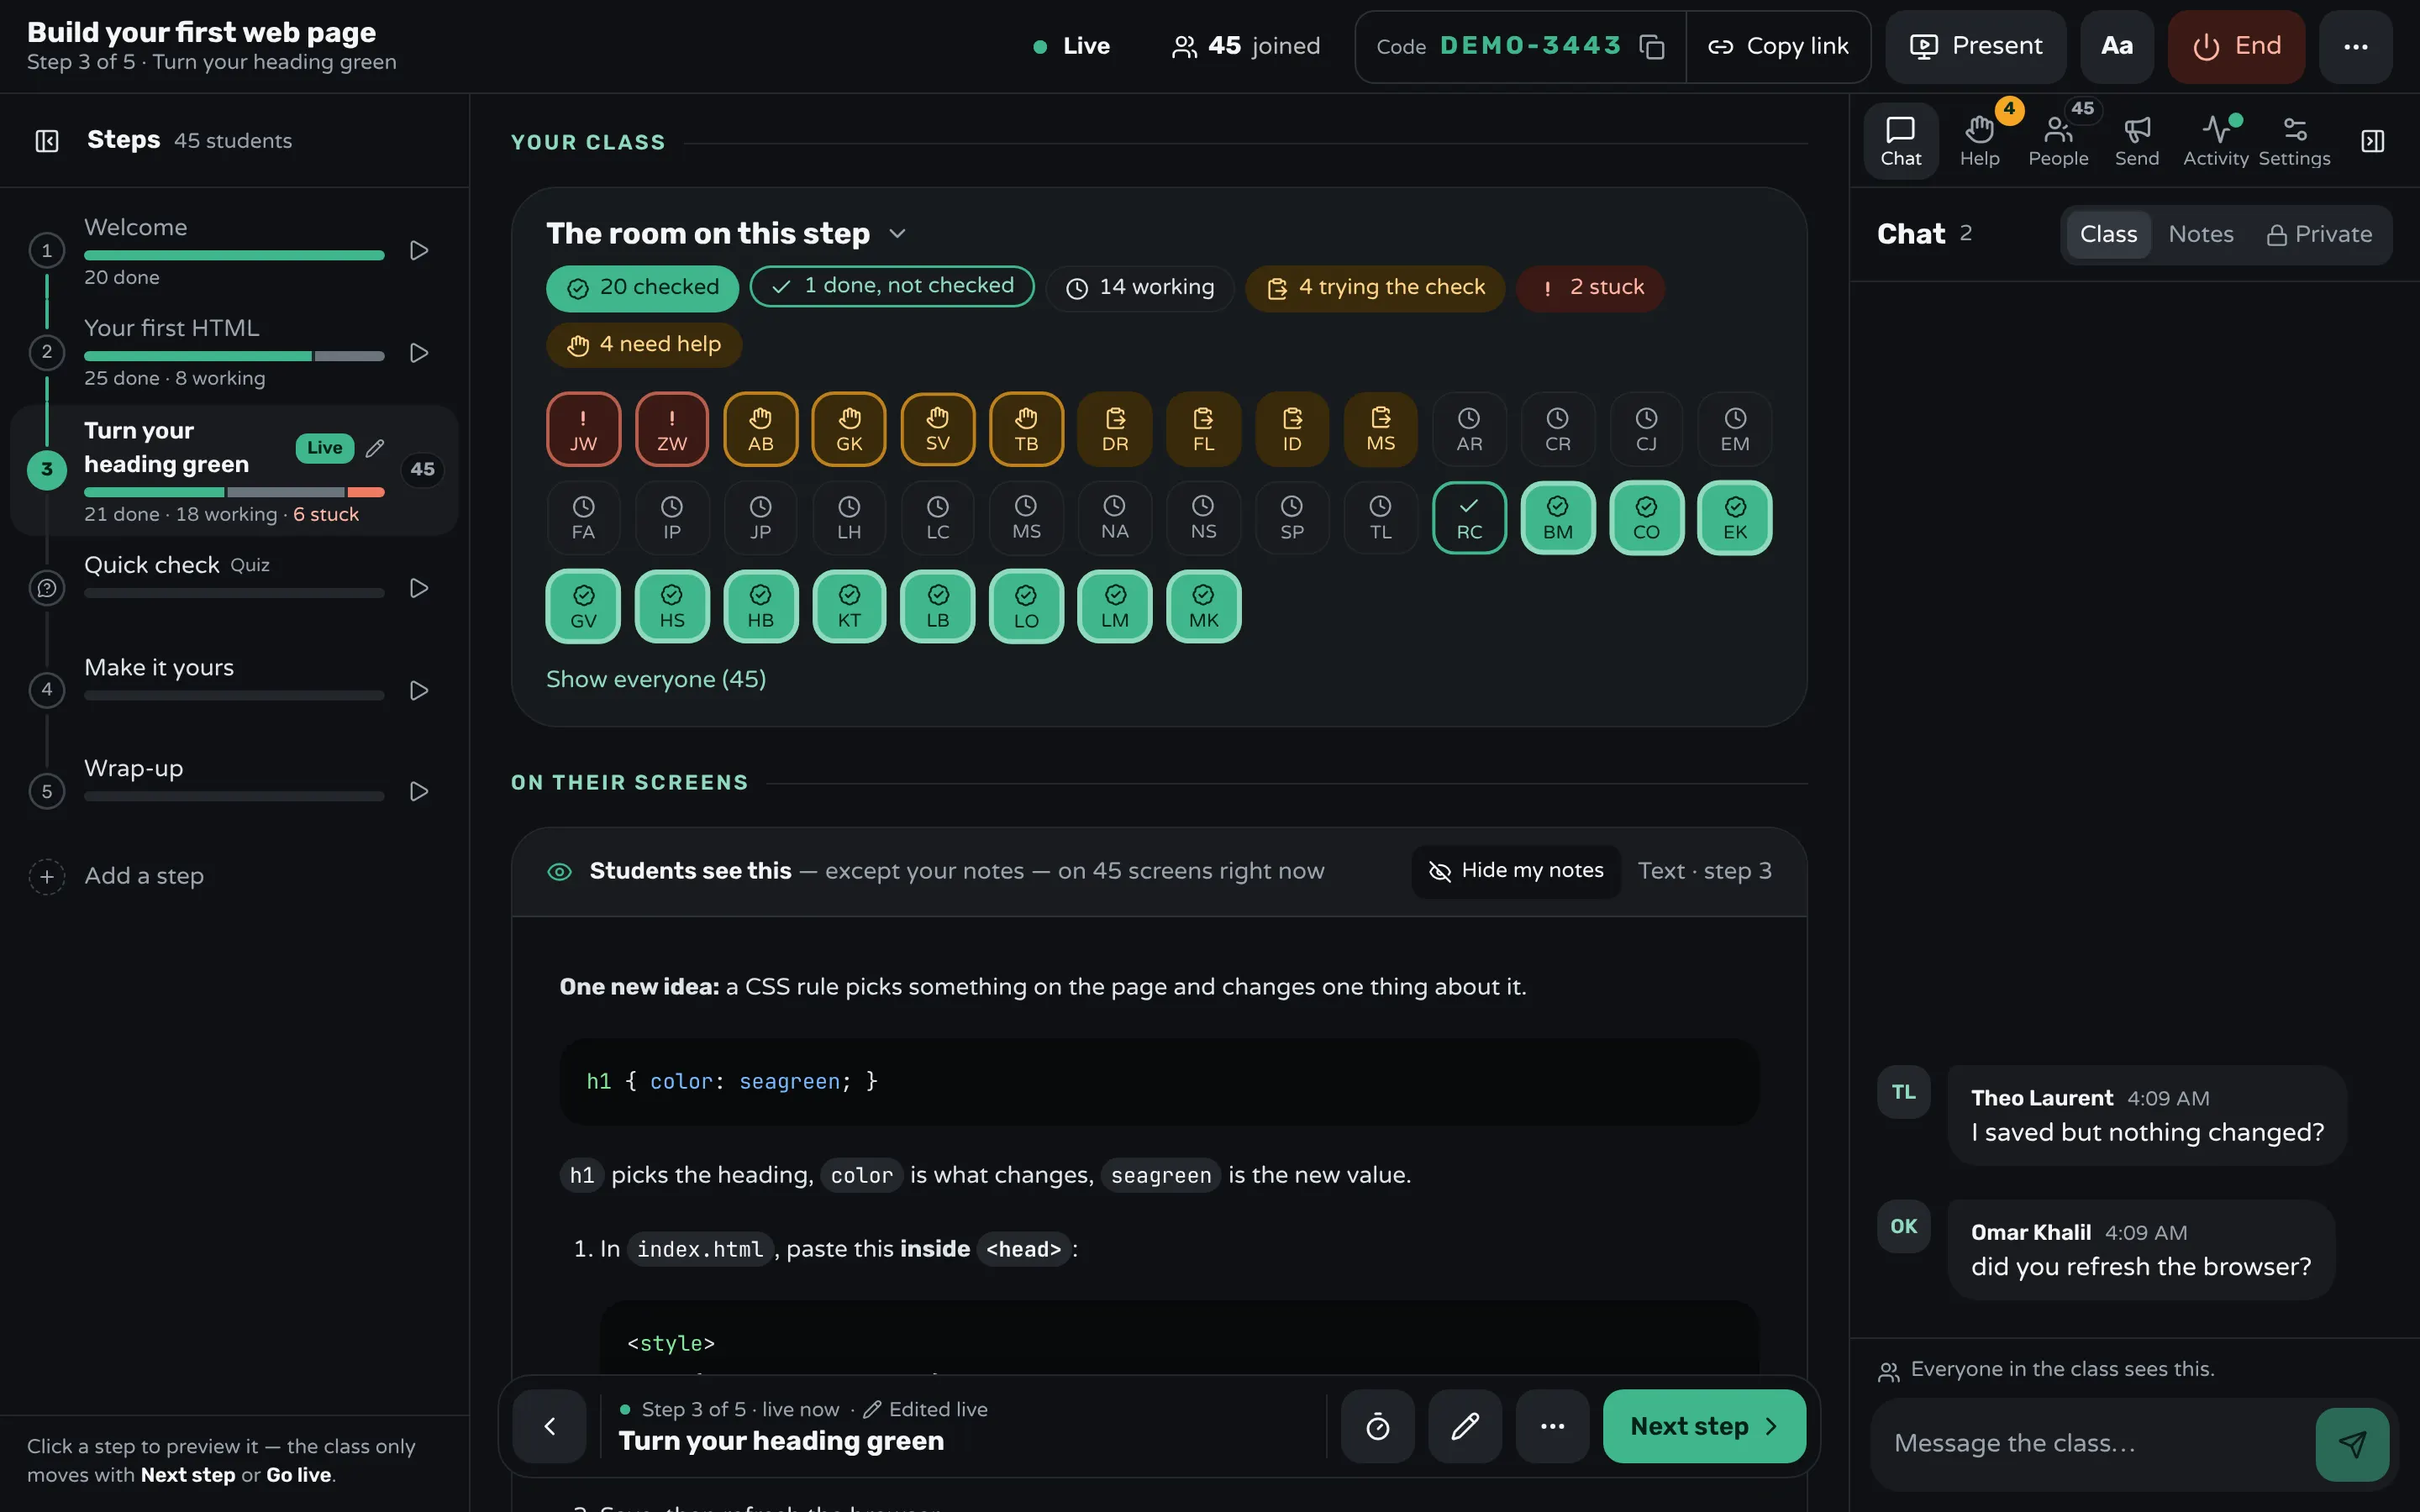
During the class, the outline of steps on your screen carries a bar for each step: how many students are done, still working or stuck on it. The step that is too big is the one where most of the class is still working while the others wait, and the room marks a student taking much longer than the rest even when they don't ask. You can edit a step mid-class, or add one, and every student's screen updates.
Before teaching, Try it in the editor runs the lesson with a pretend class, and its report points at a step that is a long read with nothing to do, or at a lesson where half the steps or more give students nothing to do. After a real class, the report's Step by step table shows, for each step, where students ended, who got stuck, who asked for help and who took longer without asking, and names the step where the class got stuck: the one to split first.
Sources
- Barak Rosenshine, Principles of Instruction: Research-Based Strategies That All Teachers Should Know (American Educator, 2012)
- Greg Wilson, Teaching Tech Together (2019)
- Nelson Cowan, The magical number 4 in short-term memory: A reconsideration of mental storage capacity (Behavioral and Brain Sciences, 2001)
- Department for Education, Support for early career teachers: How do pupils learn, autumn week 2 (Teach First)
Frequently asked questions
How many steps should a lesson have?
As many as it has new ideas, give or take a step that puts them together. For a hands-on class, three to five steps an hour, each with its own check, is a good starting point.
How long should one step take?
Three to ten minutes of doing for a typical student. If most of the class needs much longer, the step likely holds two ideas; if everyone finishes in a minute, join it with the next.
Don't small steps make the lesson too easy for strong students?
They move through them faster, which is fine. Give them optional extras at the end of a step rather than skipping steps, and a final step that combines the pieces with less help.
What is chunking in teaching?
Grouping new material into pieces small enough to hold in mind at once, and teaching one piece at a time with practice after each. Breaking a lesson into small steps is chunking applied to the lesson's plan.
How do I know a step is too big?
You can't write one sentence saying how students know they're done, or the class stalls on it: most still working, help requests piling up. Split it where the second new idea starts.
Keep reading
How to write lab instructions students can follow
Write one action per step, say what students should see after each one, and tell them what to do when their screen doesn't match.
8 min read · 31 Oct 2026
Run a live classHow to pace a lesson when students work at different speeds
Plan a core task everyone finishes, extra work for whoever finishes first, and a checkpoint where the class meets before the next idea.
7 min read · 28 Oct 2026
See who's stuckHow to check for understanding without stopping the class
Ask one question everyone answers at once, write it so wrong answers show the mistake, and decide in a minute what to teach next.
7 min read · 20 Oct 2026
Ready-made lessons from the library
Intro to Git — Snapshots, Branches & Sharing
A short, hands-on first lesson in Git for complete beginners. Students build the mental model one idea at a time — snapshots, the three areas…
10 steps · ~65 min · Free
Teacher trainingMeet Workshopy — A Live, Interactive Product Tour
A live, interactive product tour of Workshopy for new users. It runs as a real Workshopy session, so the audience experiences the product as participants while…
16 steps · ~120 min · Free
ScienceHow Epidemics Spread — R, Curves and Herd Immunity
An interactive first look at how infectious diseases spread through a population — and what stops them.
9 steps · ~60 min · Free
Learn any of them on your own, free, or copy one and teach it live. Browse the library
See it with a class of 45. No sign-up.
The live demo runs the real product with a simulated class. When you're ready, start free.