
How to turn slides into a hands-on lesson
By the Workshopy teamPublished 8 min read
Go through the deck and mark each slide as one of three kinds: a slide that explains an idea, a slide that shows how to do something, and a slide that asks the class a question. Keep the explanations, cut to a few lines each. Turn every slide that shows into a step students do on their own screen, with the instruction, the example and what they should see when it works. Turn the question slides into a check after each step, then put the steps in order and teach from them instead of from the deck.
Why a deck doesn't work as a hands-on lesson
A slide deck is built for one person talking to a room. Everyone looks at the same slide, at the same moment, at the speaker's pace. That suits a talk. In a hands-on lesson it breaks in three places: students can't see the instructions while they work, they fall behind the moment their screen differs from yours, and you can't tell who did the task and who only watched.
The case for changing it is strong. Freeman and colleagues pooled 225 studies of science, engineering and maths courses and compared classes taught by "continuous exposition by the teacher" with classes where students did activities in the room. Exam scores were higher with active learning, by about 6%, and the failure rate dropped from 33.8% to 21.8%. Students in the lecture sections were about one and a half times as likely to fail.
That doesn't mean you stop explaining. Rosenshine's summary of classroom research found the most effective teachers spent more time presenting new material than the least effective ones, not less: about 23 minutes of a 40-minute maths period, against 11. The difference was how they did it: short presentations, many examples, and practice after each small step, with the teacher checking every point before moving to the next. So the job is not to throw the deck away. It is to cut it into pieces and put practice between them.
Sort the slides into explain, show and ask
Open the deck and go through it once, writing one letter on each slide:
- E, explains. A definition, a rule, a diagram of how something works. "A CSS rule has a selector, a property and a value."
- S, shows. A screenshot of a menu, a line of code, a list of clicks. "File, then Save As, then choose CSV." These slides tell people to do something, and they are the ones a hands-on lesson turns into work.
- A, asks. "Any questions?", "What do you think happens next?", a quiz slide.
Anything left over, such as the agenda, the "about me" slide or three slides of background no task needs, goes in a pile you won't teach from. You can say it in a sentence, or leave it out.
A 40-slide deck for a beginners' class usually has more S slides than people expect. Each S is a place where students were meant to follow along and couldn't, because the next slide had already arrived.
Keep the explanations, but make them short
An E slide becomes the opening lines of a step. Write what you would say over the slide, in two or three sentences, and keep the diagram if it does the work better than words. Cut the bullet points down to what students need for the task right after it.
Put one new idea in each step. If a slide explains two things, it becomes two steps, each with its own task. That is how the steps stay small enough to check: an idea, an example, then something to do with it, which matches the short presentations with practice after each one that Rosenshine describes.
Turn every slide that shows into a step students do
This is where most of the change happens. A slide that shows a procedure becomes a step with three parts:
- The action, one at a time, numbered. "Under your heading, add a link to a site you like."
- The example, ready to copy: the line of code, the formula, the exact menu path. On a slide it was a picture of text; in the step students can select it.
- What they should see when it worked. "You're done when clicking your words opens the site." This is the line most decks never had, and without it students can't tell whether they are done or stuck.
If the slide was a screenshot of a result, keep it in the step: it is what students compare their own screen with. Write the instructions in the second person, one action per line. The guide on writing lab instructions students can follow goes further on wording and on what to say when the result doesn't match.
For software, a demo you used to give with slides often works better live. Teaching Tech Together puts it plainly: "A slide deck is like a railway track: it may be a smooth ride, but you have to decide in advance where you're going." The Carpentries, who teach programming to researchers worldwide, teach without slides altogether and type the code in front of the class while learners type along. Do the step once, slowly, on the projector, then let the class do it on their own screens.
Turn the questions into checks after each step
"Any questions?" gets silence from a room that is lost. Replace each A slide with a question every student answers, placed right after the step it is about:
- Ask for the result, not for confidence. "Paste the line you wrote" or "What number did the formula give?" tells you more than "Is everyone OK?"
- Write the wrong answers you expect. If students tend to forget the closing tag, a check that recognises that paste can say so straight away.
- Keep the quiz for the end of a section, where a few questions cover several steps. The guide on checking for understanding without stopping the class has more on writing questions whose wrong answers show the mistake.
Keep the projector for what everyone shares
The projector is still useful. It is good at showing one thing to everyone: the diagram you are pointing at, the demo you are typing, the step the class is on. It is bad at instructions, which students need to read at their own pace while they work. Put the steps on every student's own screen, and use the wall for the moment you explain or demonstrate.
Your speaker notes have a place too. What you used to read off the notes pane, such as the question to ask, the slip most people make or how long the step takes, becomes a note beside the step that only you see.
Try it before the class does
Before the lesson, go through it as a student would, step by step, without the deck. Every place you need to say "as you can see on the slide" is a step missing its example or its result. Time yourself, then expect the class to take two or three times as long.
Build it in Workshopy
Workshopy has no importer for PowerPoint or Google Slides files, so the lesson is rebuilt as steps, which is the point of the exercise. Each step is a heading in one document: you write it in the template editor's Visual mode, or in Markdown, where every # line starts a step. If your slides are already Markdown, as in Marp or Slidev, turn each slide's title into a # line and import the file from the Templates page: New template, then Import Markdown.
Inside a step you keep what the slide had: a picture uploaded from your computer (a diagram, a screenshot of the result), code in a code block students can copy, and an interactive block if the slide was an animation students should play with themselves. Your speaker notes go in a teacher block, which only you see on your own screen; Hide my notes puts them away when you share your screen. The A slides become a Check your work block, where students paste what they got and are told at once whether it is right, or a quiz step for the end of a section.
If an AI app such as Claude is connected to your account (connecting one is open to every account), you can give it the deck's text and ask it to write the template as steps, each with a task and a check. Check every step before you teach it. Then press Try it in the editor to run the lesson with a pretend class first.
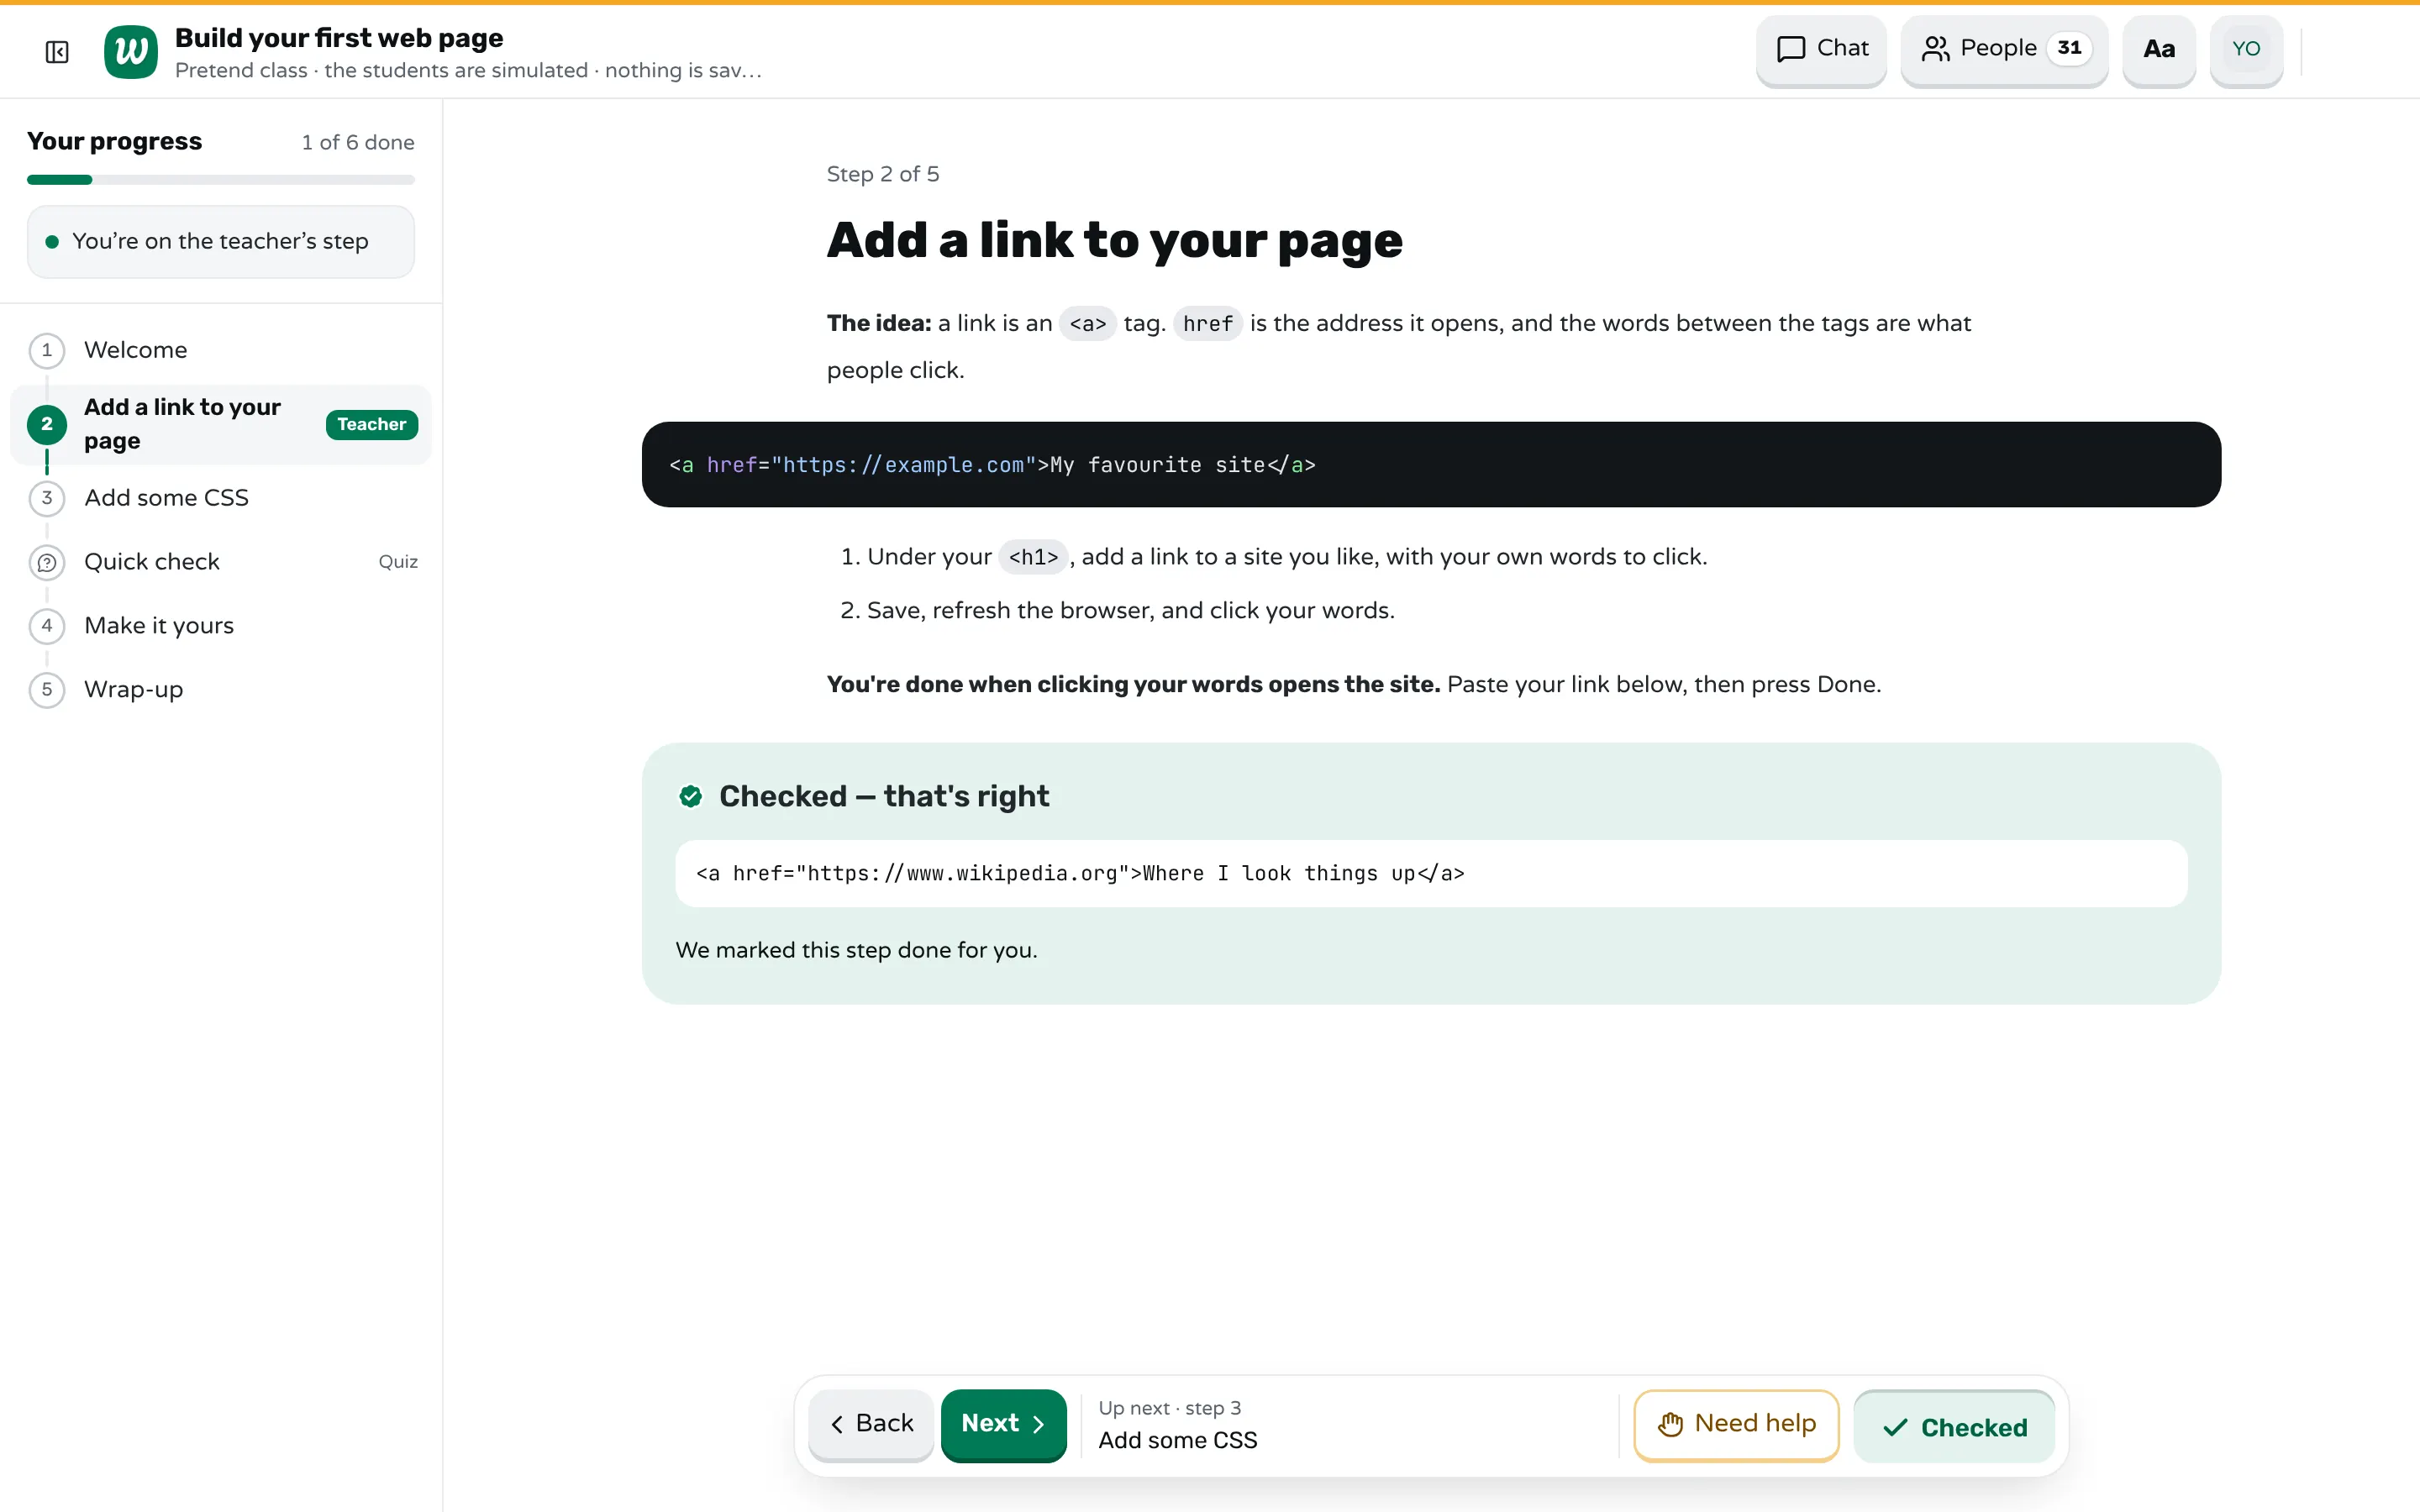
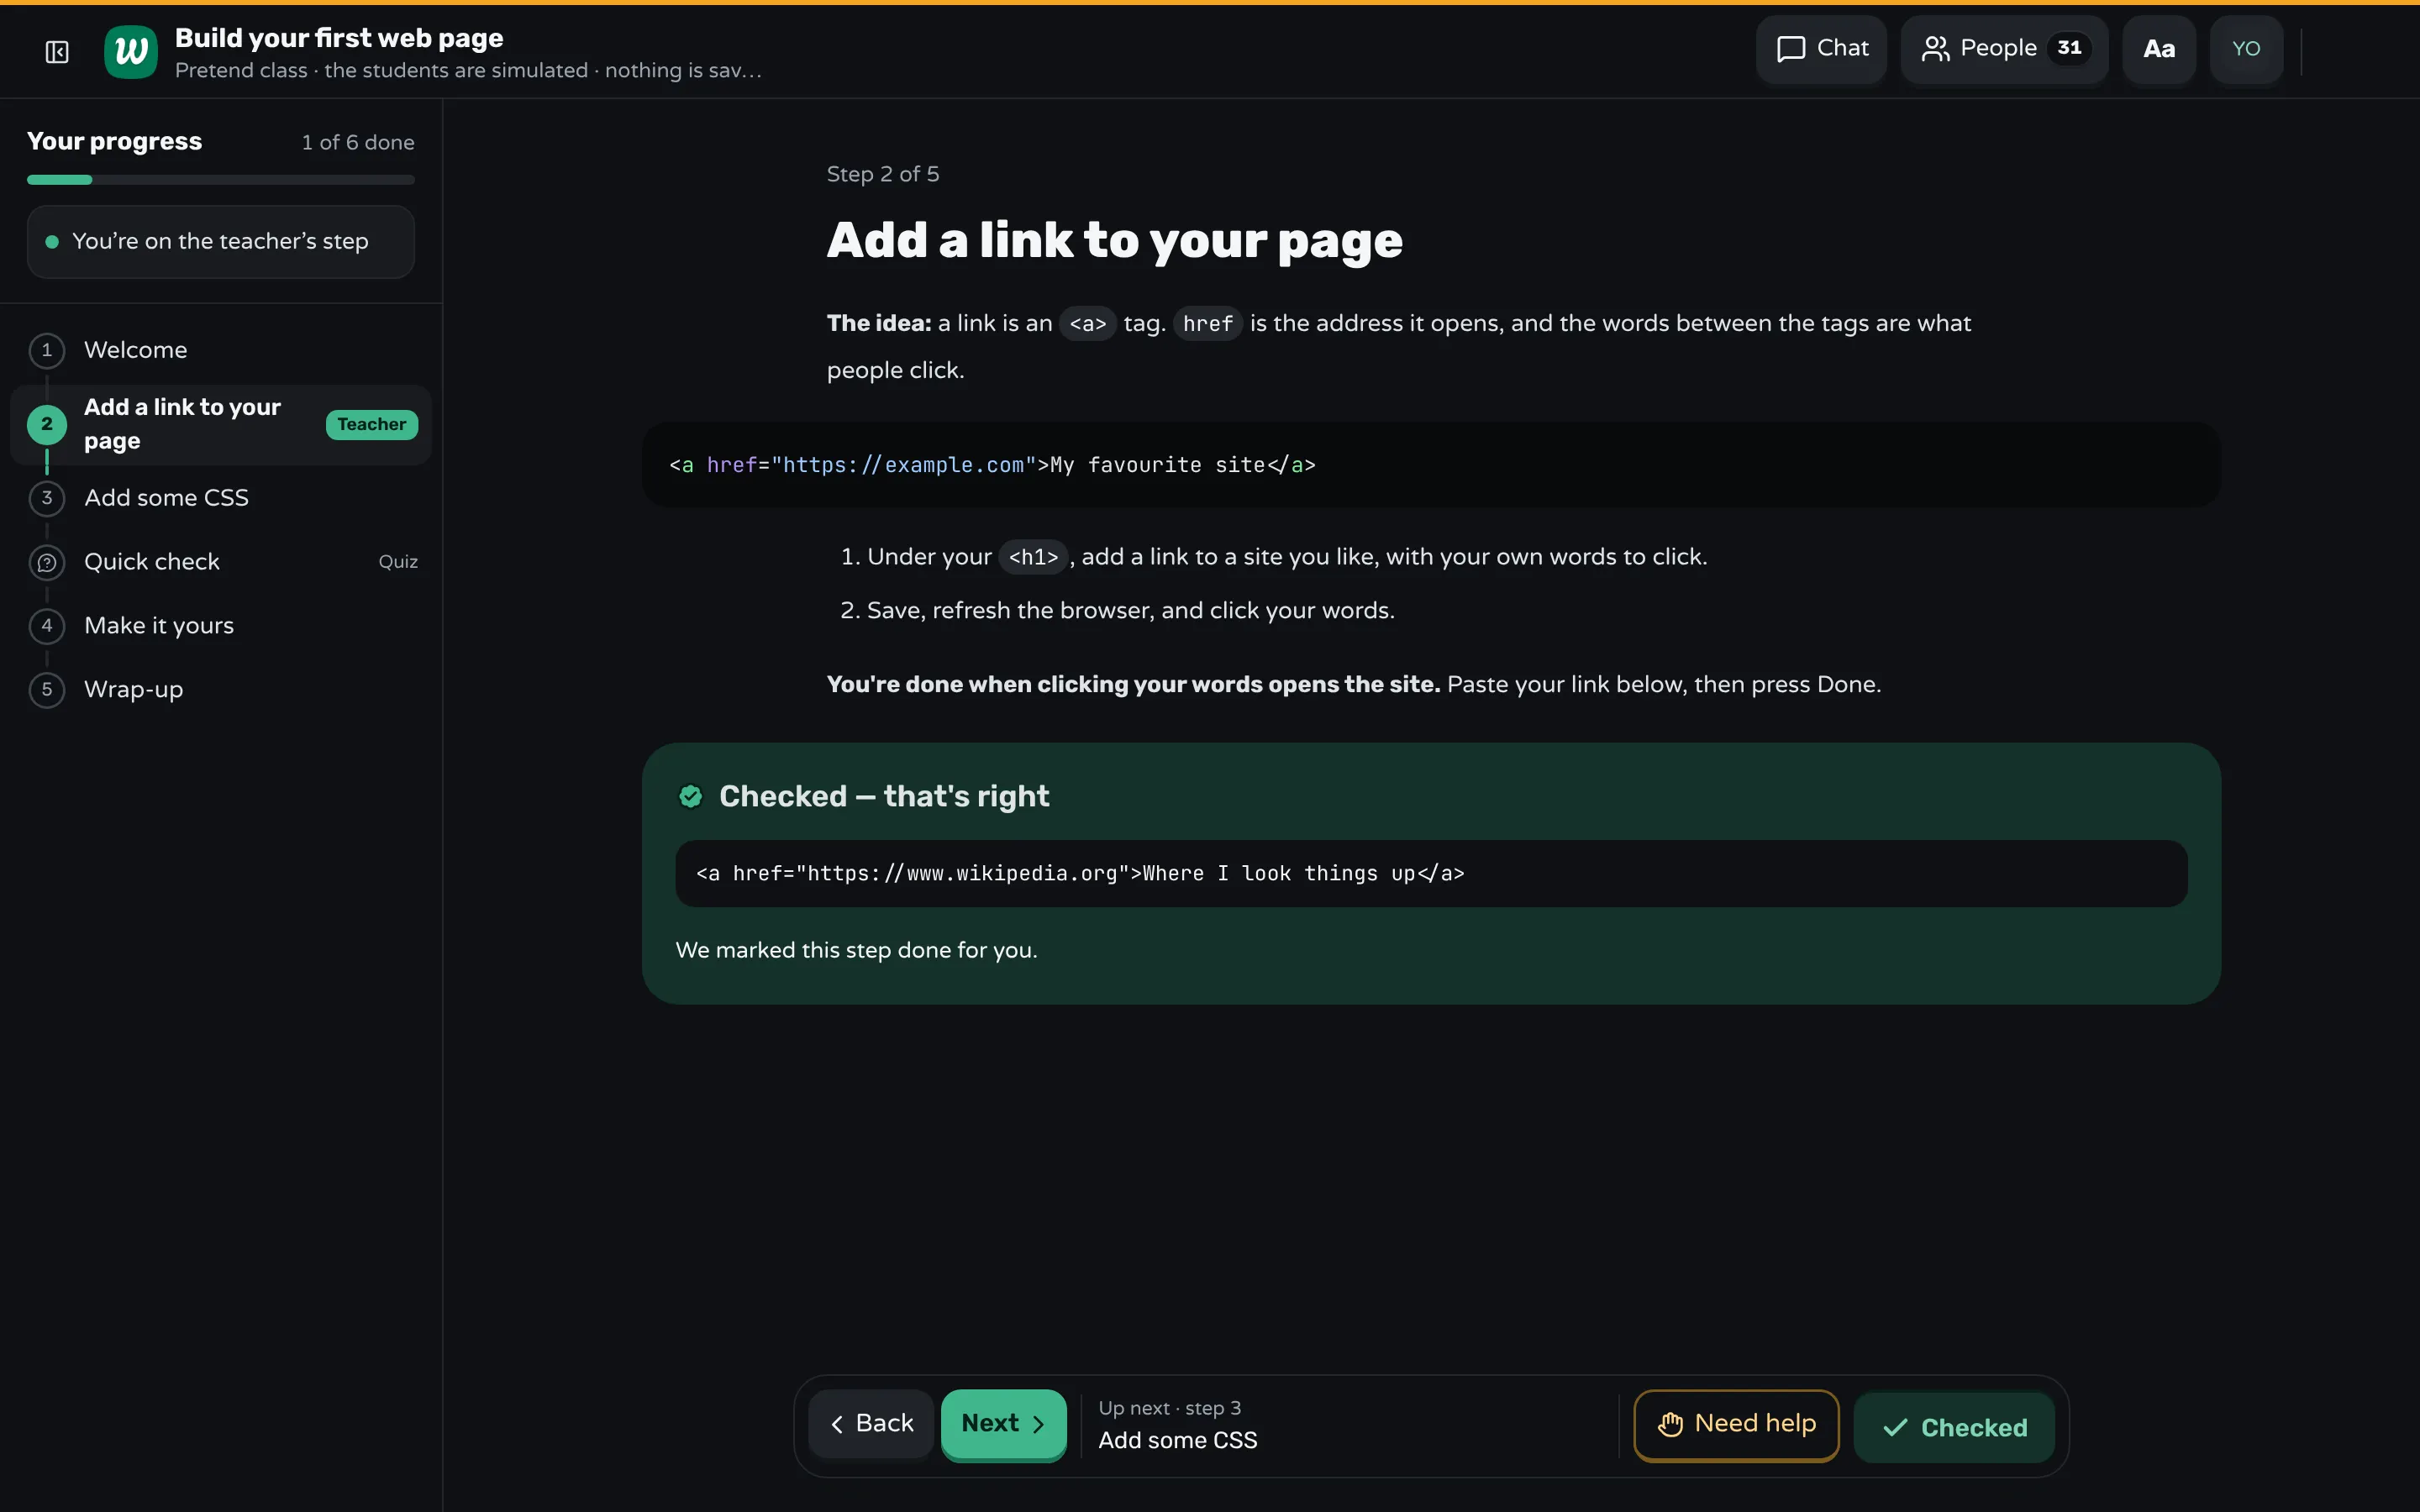
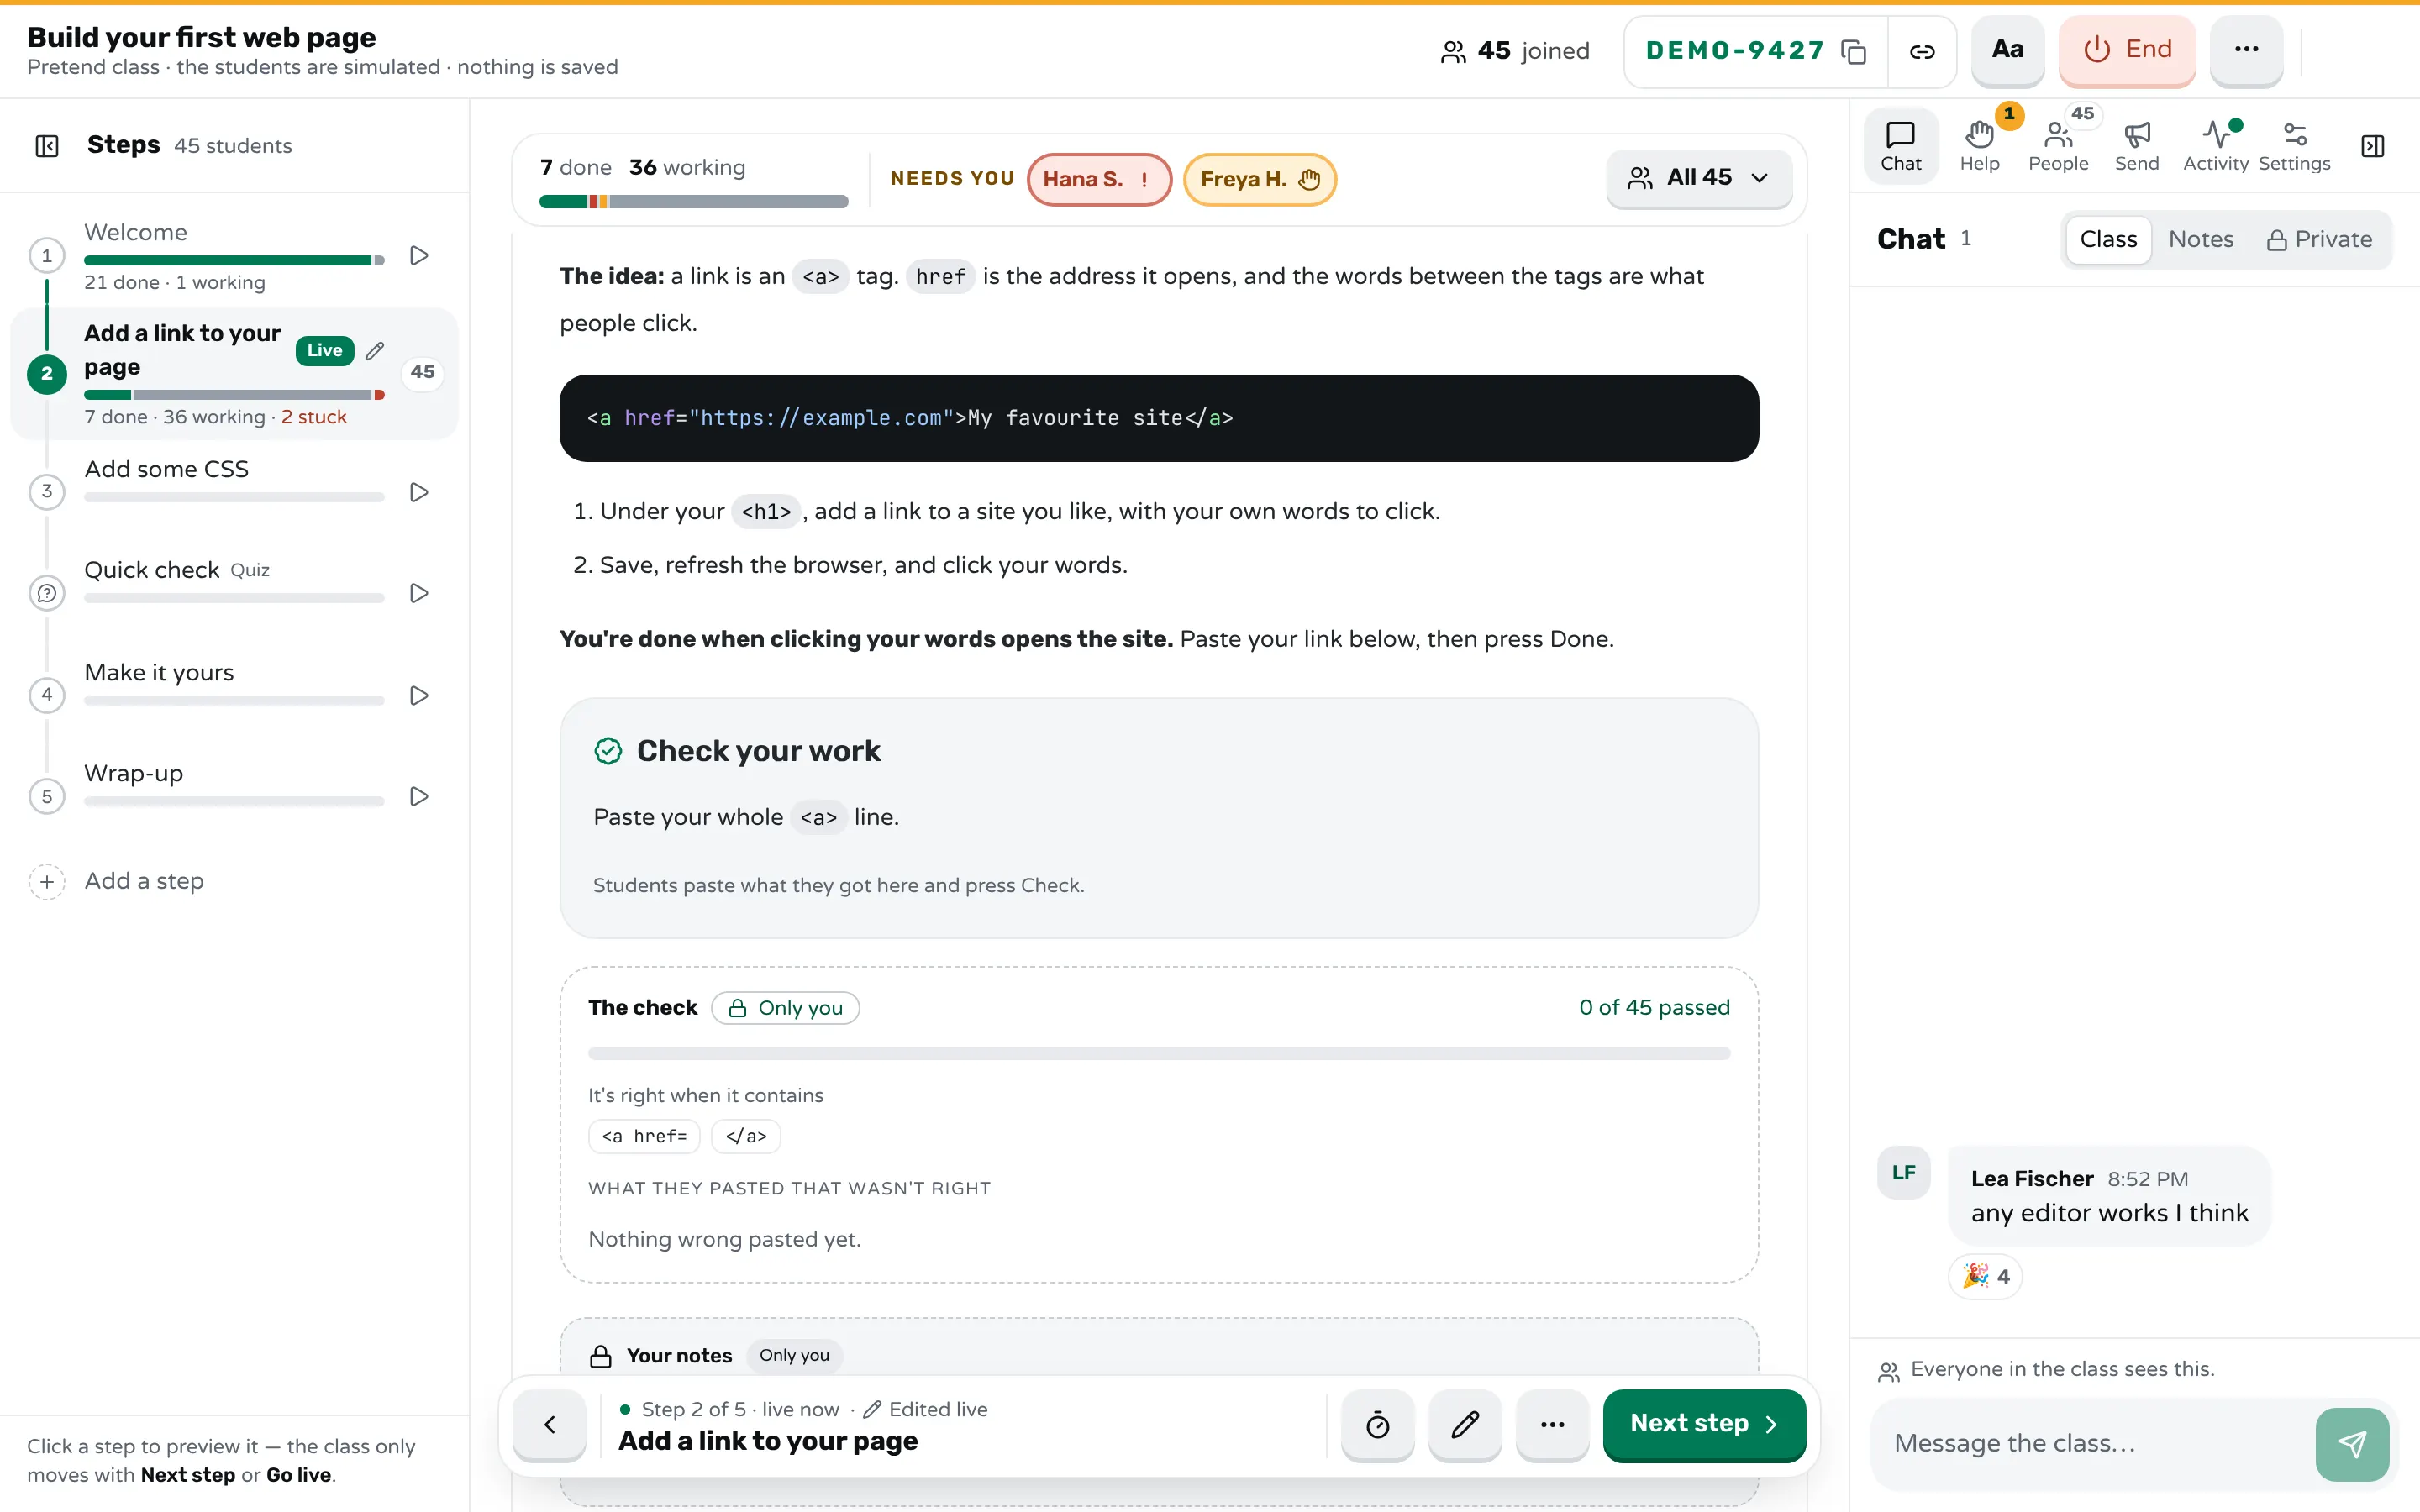
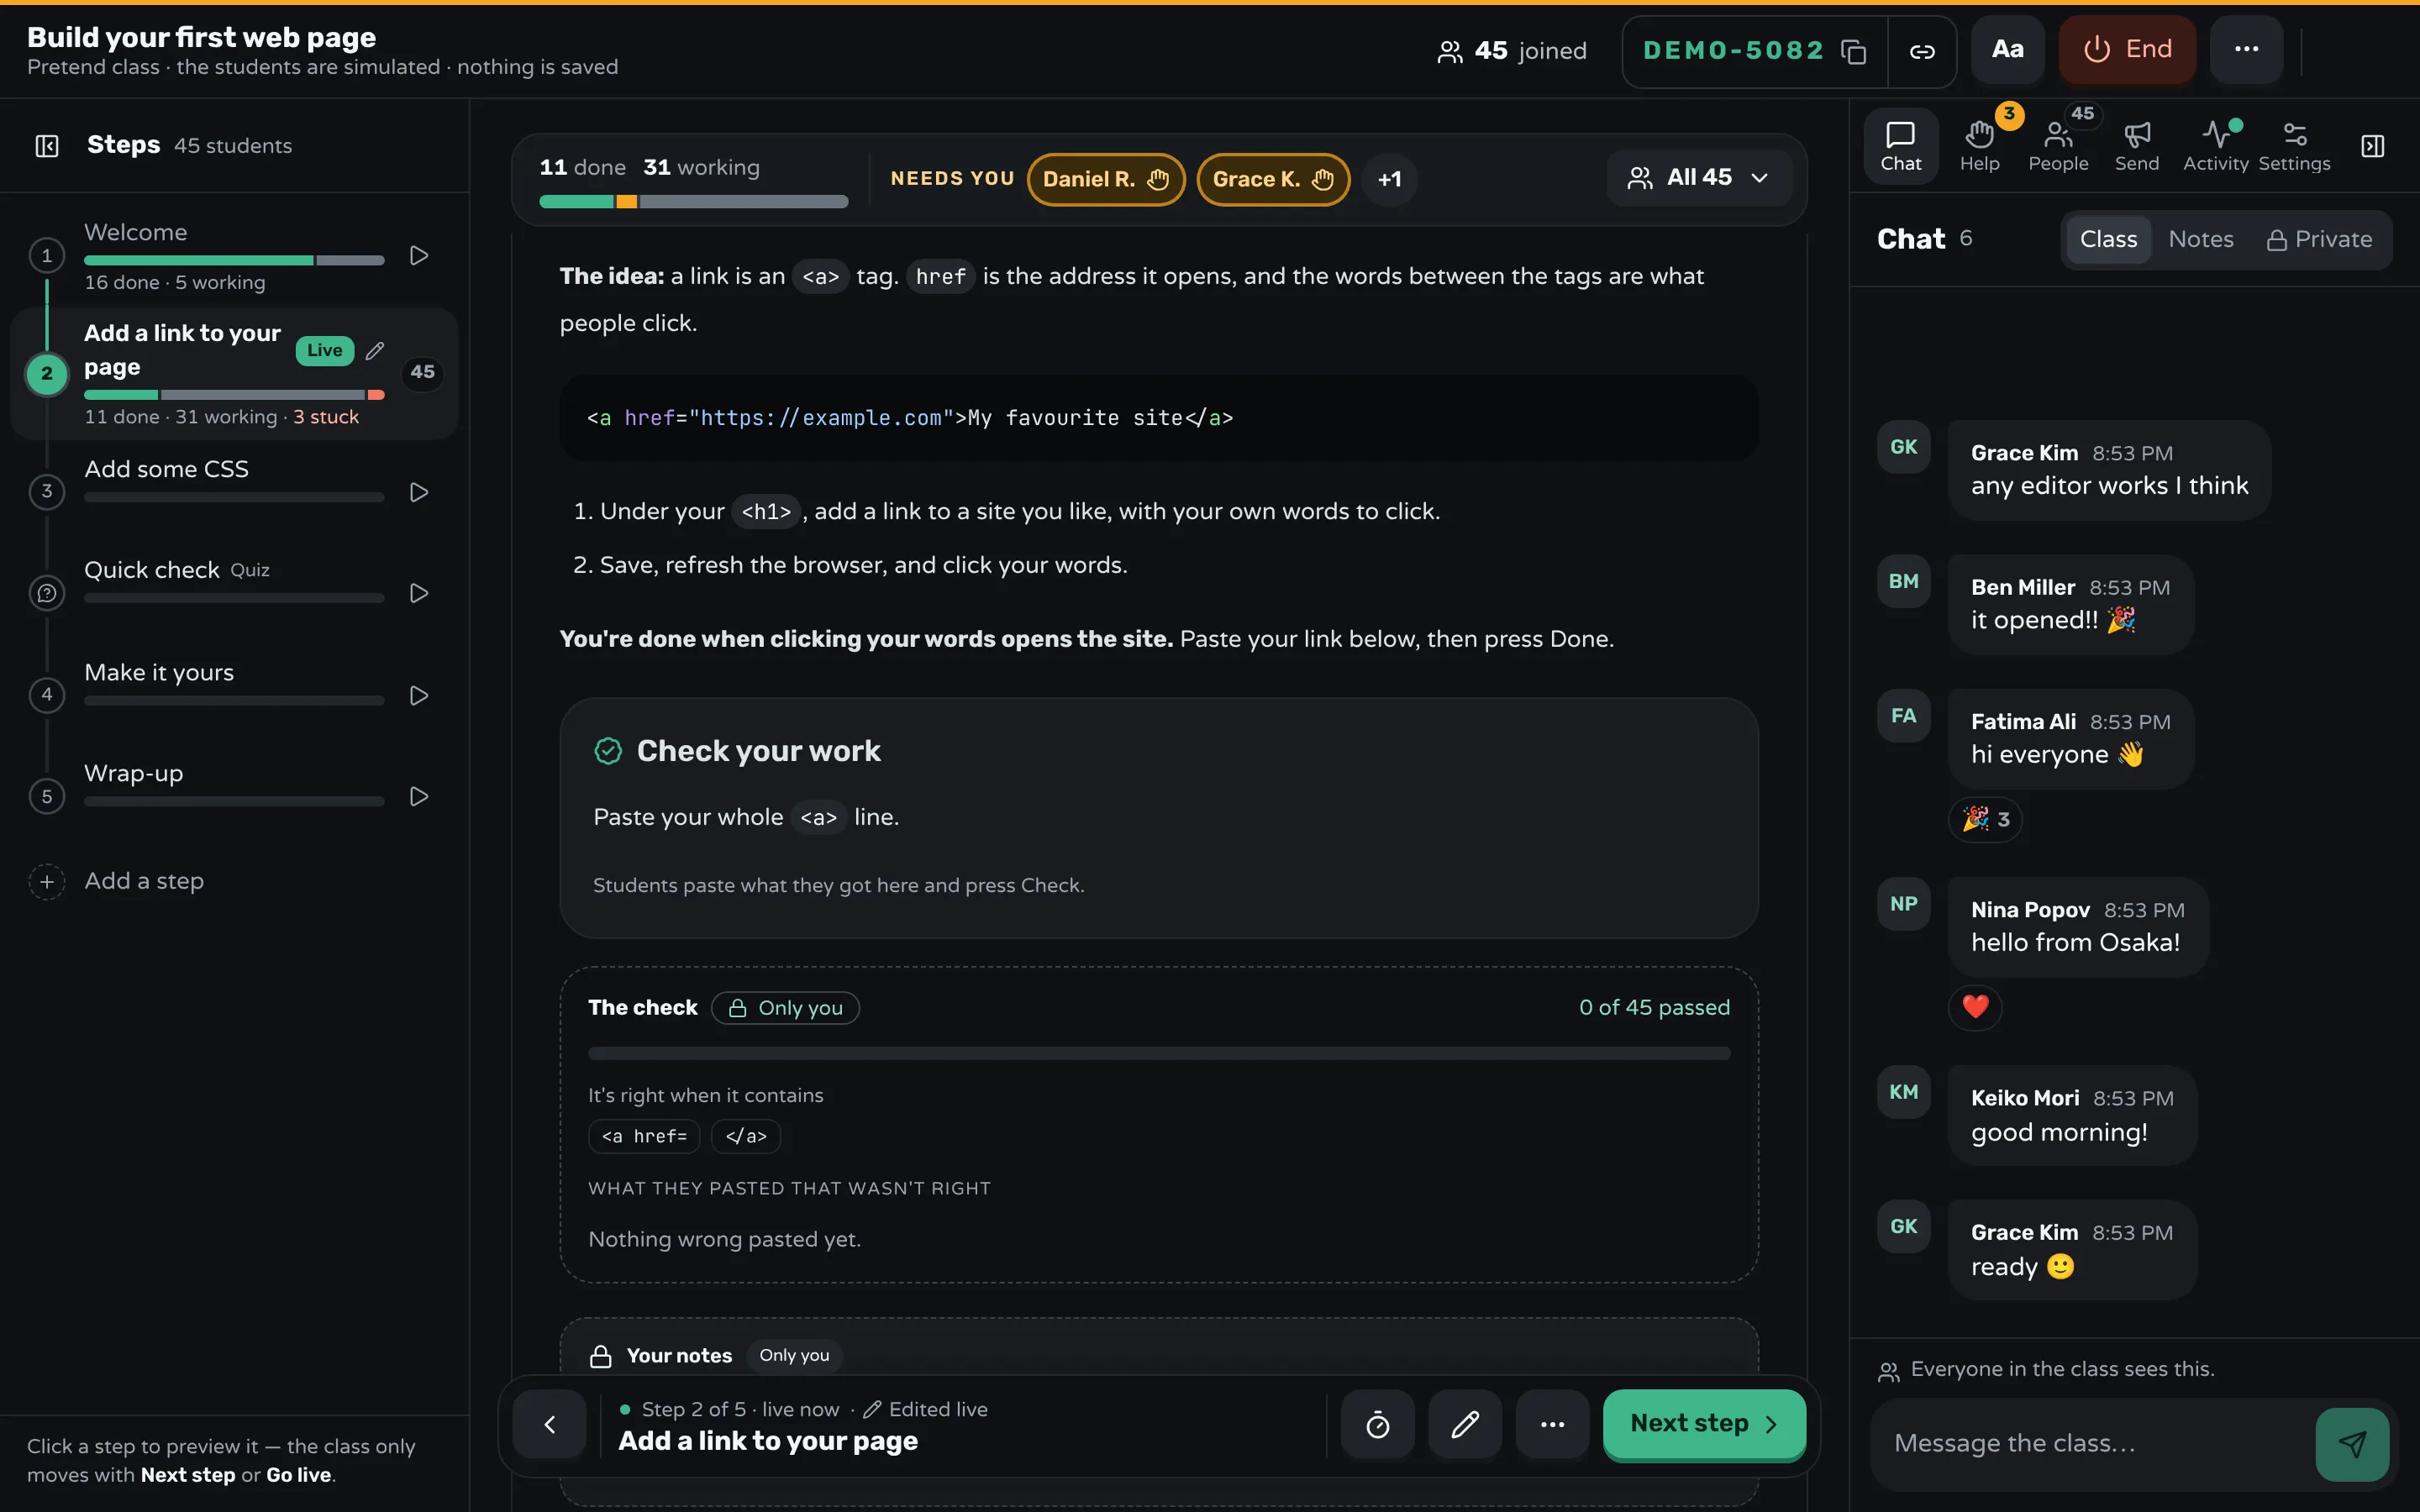
In class, Present puts the step on the projector, and each student reads and works on their own screen. The room shows who pressed Done, who is still working and who pressed Need help. When the class ends, each student's screen links to a page of the lesson as it was taught (a setting you can turn off), so you no longer need to send the slides afterwards.
Sources
- Freeman et al., Active learning increases student performance in science, engineering, and mathematics (2014)
- Barak Rosenshine, Principles of Instruction: Research-Based Strategies That All Teachers Should Know (2012)
- Greg Wilson, Teaching Tech Together: Live Coding (2019)
- The Carpentries, Instructor Training: Live Coding is a Skill
Frequently asked questions
Should I stop using slides in a hands-on class?
Not entirely. Keep a few for what the whole room looks at together, such as a diagram you explain. Move instructions, code and anything students act on into steps on their own screens.
How many slides make one step?
Usually one slide that explains and one that shows become one step: a short explanation, then a task. A slide that covers two new ideas becomes two steps.
What do I do with my speaker notes?
Keep the useful ones as notes for yourself beside each step: the question to ask, the common mistake, how long the step takes. Cut the ones that only repeat the slide.
How long does it take to convert a deck?
The sorting takes minutes. Writing a task and a check for each slide that shows is most of the work, so plan on rebuilding a section at a time and teaching it before you convert the rest.
Can students still get the material afterwards?
Yes. Give them the steps rather than the deck: the steps hold the instructions, the examples and the expected results, which a slide deck without its speaker rarely does.
Keep reading
How to break a lesson into small steps
List what students must be able to do, give each skill a step with one new idea, and end every step with a result students can check.
8 min read · 2 Nov 2026
Hands-on & coding workshopsHow to write lab instructions students can follow
Write one action per step, say what students should see after each one, and tell them what to do when their screen doesn't match.
8 min read · 31 Oct 2026
Build lessonsHow to make an interactive lesson students can play with
Pick the idea students learn best by doing, give it two or three controls that respond at once, and build it into the lesson's step.
3 min read · 19 Oct 2026
Ready-made lessons from the library
Intro to Git — Snapshots, Branches & Sharing
A short, hands-on first lesson in Git for complete beginners. Students build the mental model one idea at a time — snapshots, the three areas…
10 steps · Free
Teacher trainingMeet Workshopy — A Live, Interactive Product Tour
A live, interactive product tour of Workshopy for new users. It runs as a real Workshopy session, so the audience experiences the product as participants while…
16 steps · Free
Teacher trainingTrain the Trainer: How to Design a Hands-On Workshop
A train the trainer workshop on designing hands-on sessions: write objectives you can see, plan an hour of talks, exercises and checks, find who's stuck.
11 steps · Free
Learn any of them on your own, free, or copy one and teach it live. Browse the library
See it with a class of 24. No sign-up.
The live demo runs the real product with a simulated class. When you're ready, start free.